🚀 Prerequisites
✅ No credit card required to get started!
Step 1: Create an Azure Free Trial Subscription
To use the Variant Development Platform, you'll need an active Azure subscription. We recommend creating a free trial account, which provides $200 in free credits for the first month.
-
Visit Azure Free Trial
-
Sign up using a Microsoft account
-
Choose Pay-As-You-Go with Owner permissions
This is required to allow role assignments during service registration.
Step 2: Register for a Variant Subscription Account
-
Fill out the form with your details (Use JK for the invitation code)
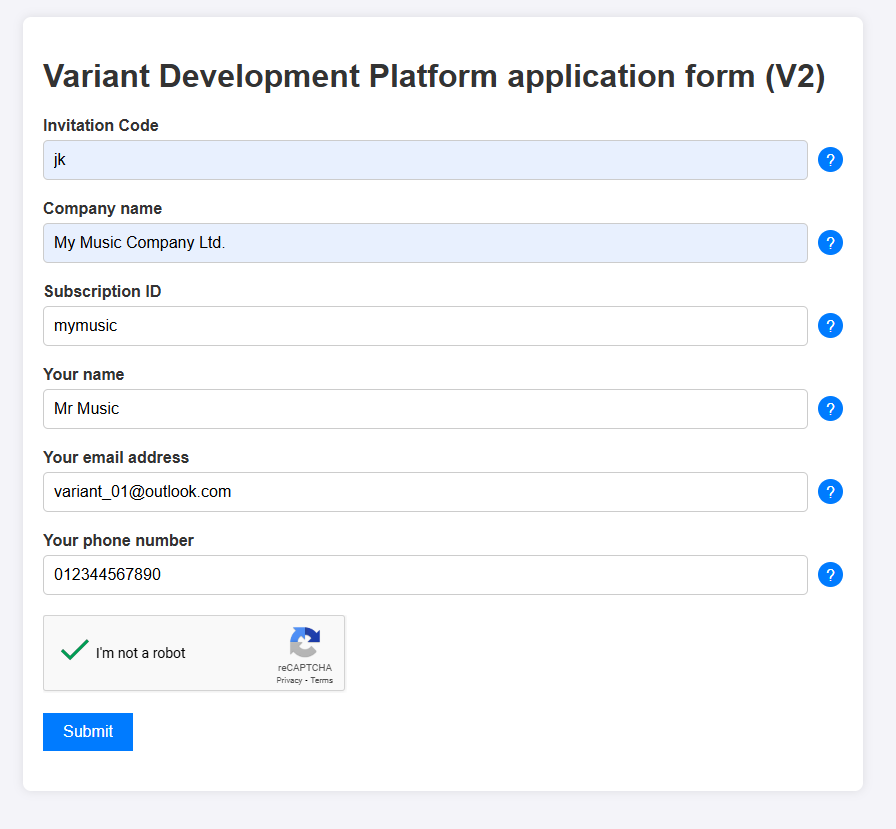
- If successful, you will receive a confirmation email with a link to register your Azure subscription.

- Within a few minutes, you'll also receive a second email (check your junk/spam folder if not).
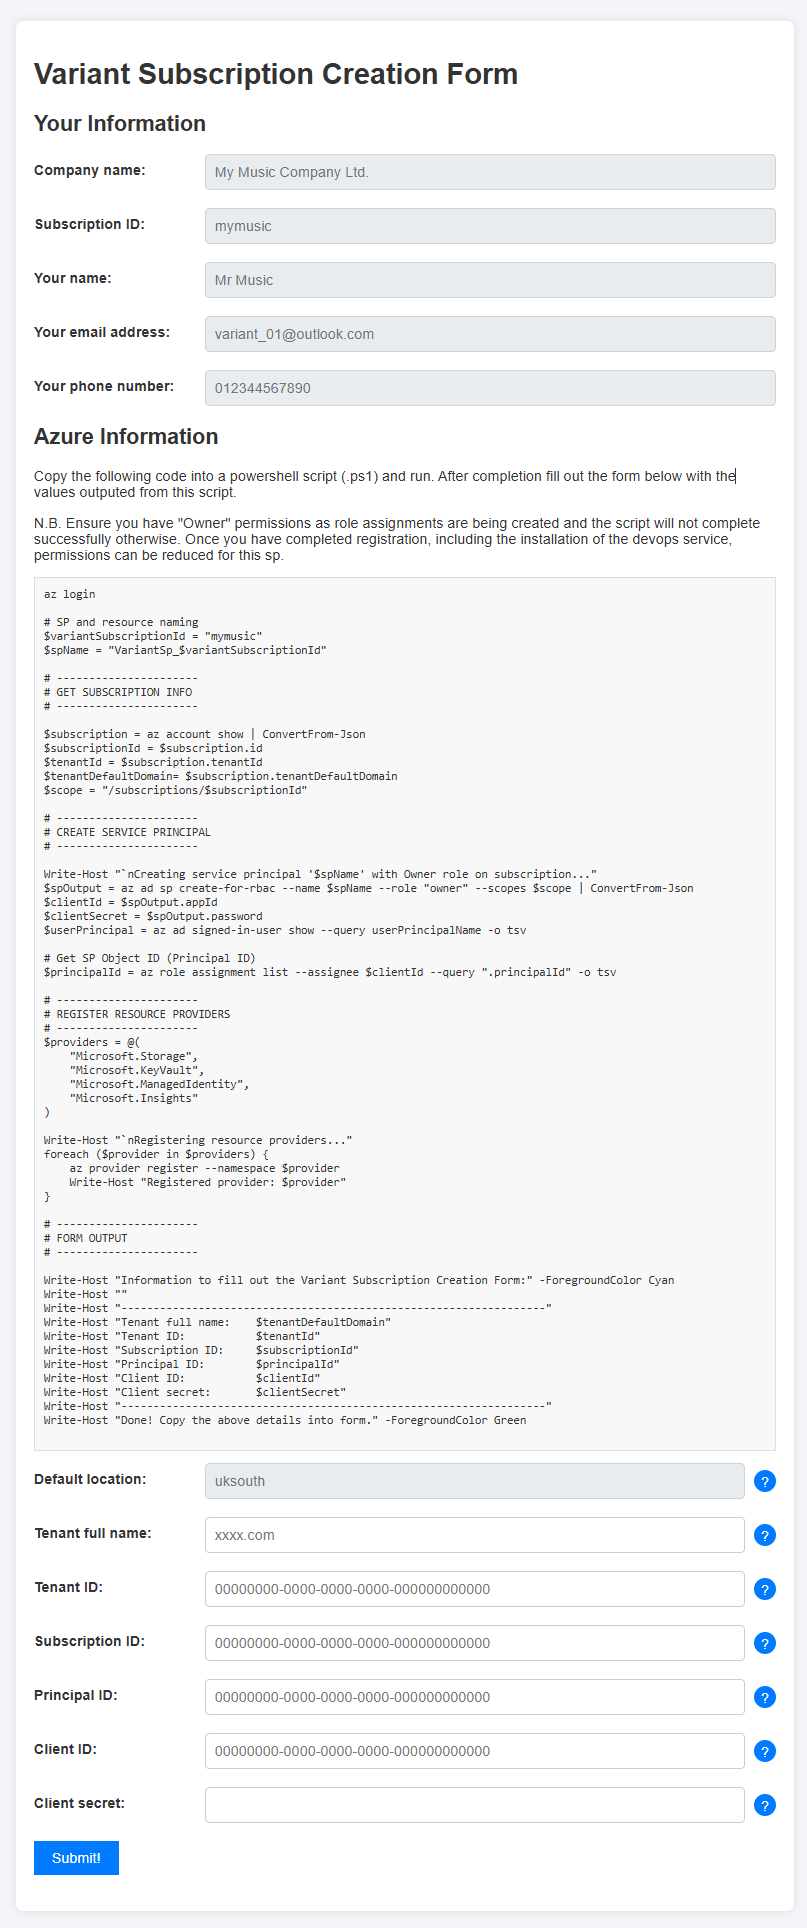
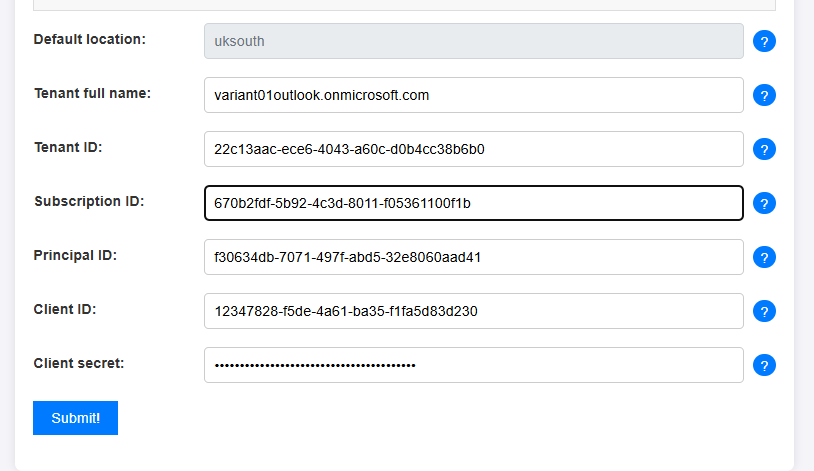
Step 3: Register Your Azure Subscription
Click on the link in the email to access the Azure subscription registration form.
- Open the Start Menu and launch Windows PowerShell ISE.
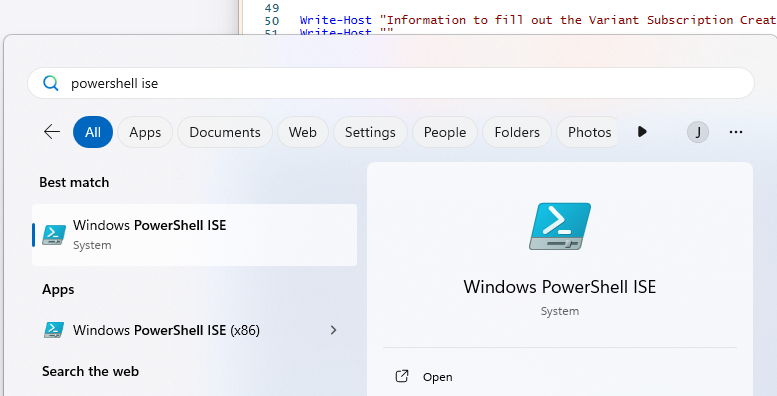
-
Copy the provided PowerShell script from the form into PowerShell and run it.
✅ Make sure you're logged in to the correct Azure subscription.
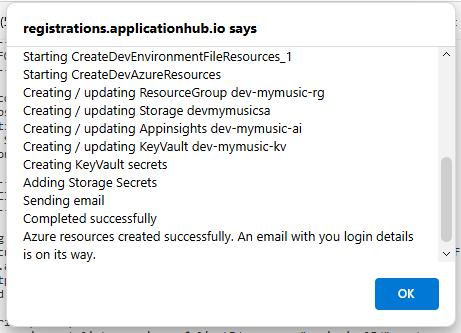
If successful, you’ll see output like this:
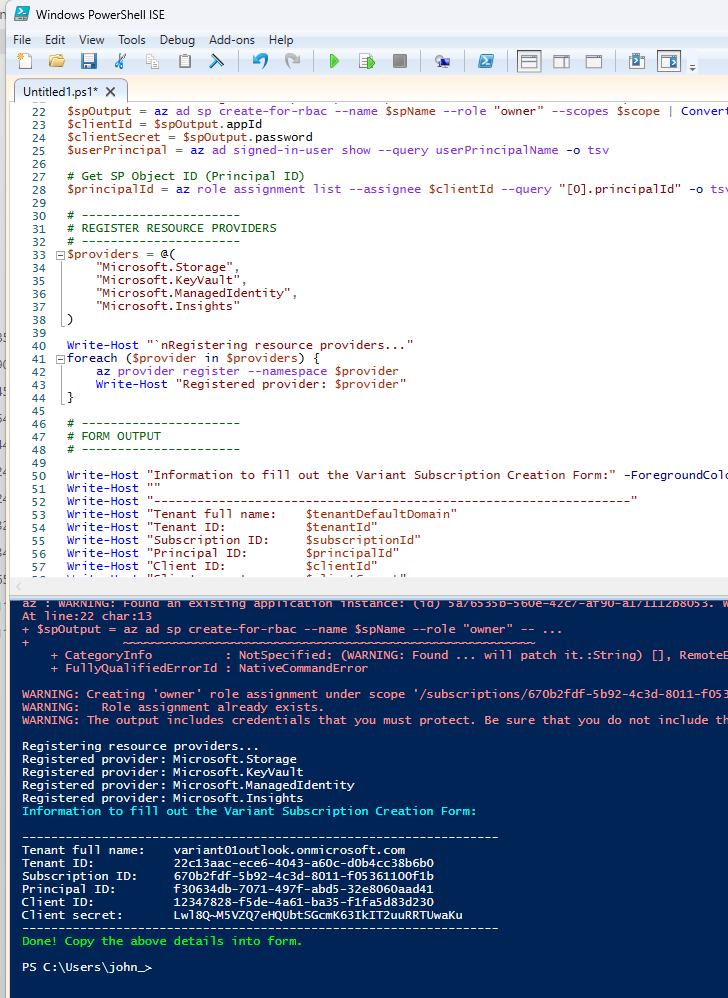
- Copy the generated output back into the form and click Submit.
- After a few minutes You should see a confirmation dialog.
⏱️ If you encounter a timeout error, just click Submit again.
Step 4: Log In and Access the Dashboard
After submitting the subscription form, you'll receive an email with a login link.
- Click the link and sign in
You should see the Variant dashboard:
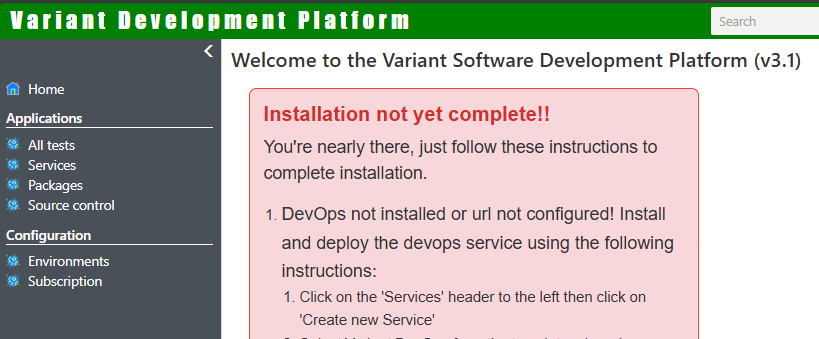
Step 5: Create the Variant. Devops service
For security and governance this service will perform all deployment and environment changes in your subscription and is the only service that the UI will manage the deployment of. Once this service is up and running permissions on the service principal permissions should updated to a contributor at maximum.
-
Navigate to Applications > Services
-
Click Create New Service
-
Fill out the form exactly as shown below.
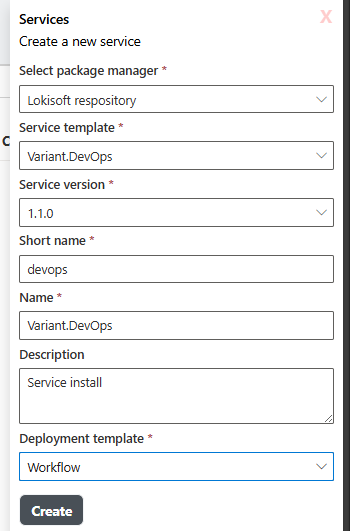
💡 The template you choose determines the hosting plan:
Consumption (free tier): Suitable for basic testing
Workflow (recommended): Always-on, production-ready
⚠️ Note for free Azure trial accounts: Always select the Workflow template. Azure imposes limits on the number of free Consumption-based App Service plans.
Step 6: Deploy Your DevOps Service
After creating the service:
-
Click into your service
-
Click Deploy Application
You will see deployment notifications:

After deployment finishes, click Refresh. You should now see your service details:
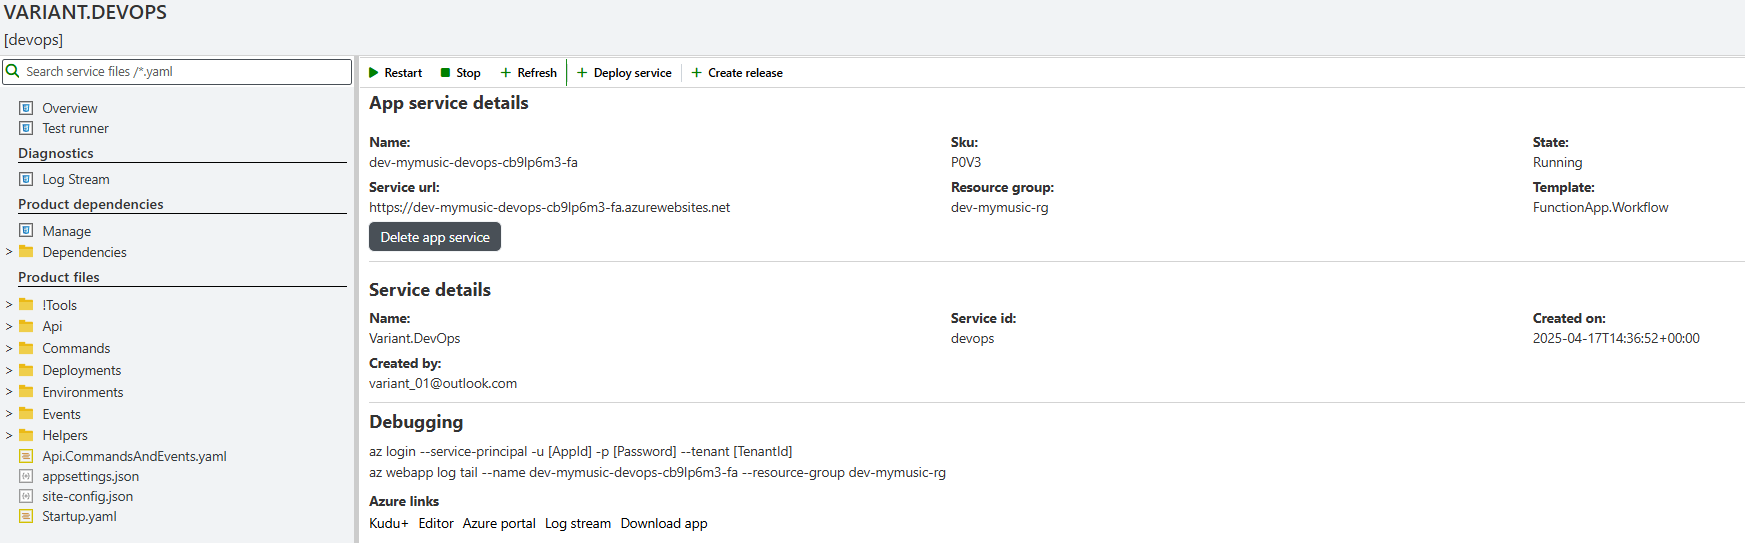
Step 7: Set the DevOps Service URL
The DevOps service manages all future service deployments and environment updates — but it needs to know where it lives.
-
Copy the DevOps Service URL (e.g.,
https://dev-mymusic-devops-cb9lp6m3-fa.azurewebsites.net) -
Go to Subscriptions > Environments
-
Paste the URL in the DevOps URL field and click Update.
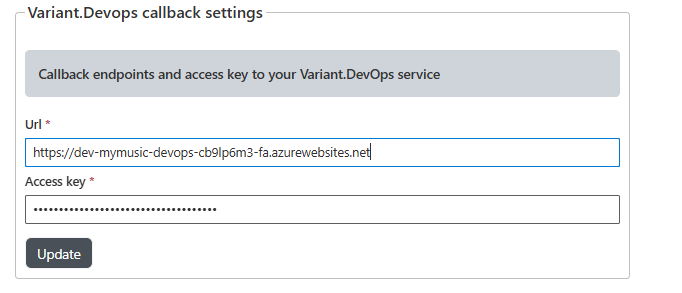
✅ No other fields need to be changed.
🎉 Your environment is now fully registered and ready to use!
✅ What’s Next?
Get ready to create and deploy your first real application using Variant! 🚀